如何debug星云项目
作者:Wenbo Liu aries.lwb@gmail.com, July 17, 2017
Go-Nebulas项目地址:https://github.com/nebulasio/go-nebulas.git
简介
这篇短文基于Mac OSX 和 Ubuntu系统,简单介绍如何调试Go-Nebulas项目,主要介绍三种方法调试:dlv命令行调试,Gogland IDE调试,以及Visual Studio Code调试。
调试器Delve安装
在 Mac OSX 上安装Delve
Google官方为golang的调试例子用gdb,但是delve是更合适的调试器,比gdb能提供更多的信息。安装delve,在Mac上一般采用Homebrew。但是很遗憾,在本文写就时,Homebrew提供的delve包老旧,有bug,无法正确调试Go-Nebulas。普通的go项目是可以的,具体体现就是调试Go-Nebulas项目时,断点无法停住,会永远hang住。我们必须从github上下载delve的最新源代码编译成delve binary,步骤如下:
先用Homebrew安装有bug的Delve:
brew install go-delve/delve/delve
rm /usr/local/bin/dlv
安装此有问题的Delve,其实就是为了让它帮我们在Mac机器上签发一个自签名的dlv-cert证书。如果你自己愿意繁琐的手动创建证书,也可以不用安装Delve,参考https://github.com/derekparker/delve/blob/v0.12.2/Documentation/installation/osx/install.md的【Create a self-signed certificate】。 第二条rm命令是为了删除这个有问题的dlv binary,我们需要从源码编译出一个正确的版本,并且利用Homebew为我们安装的证书做codesign。 下载源代码
mkdir -p /Users/xxx/go-delve/src/github.com/derekparker
cd /Users/xxx/go-delve/src/github.com/derekparker
git clone https://github.com/derekparker/delve.git
创建一个临时文件夹,从github下载代码。注意文件夹中标注红色的部分,必须完全一样,这是因为go项目的源码组织规则,否则下一步编译会出错,报警package not found。其它部分请根据自己机器环境设置。
编译
export GOPATH=/Users/xxx/go-delve
cd /Users/xxx/go-delve/src/github.com/derekparker/delve
make install
应该会出现如下提示,表明编译成功:
scripts/gencert.sh || (echo "An error occurred when generating and installing a new certicate"; exit 1)
go install -ldflags="-s" github.com/derekparker/delve/cmd/dlv
codesign -s "dlv-cert"  /Users/xxx/go-delve/bin/dlv
然后cp /Users/liuwb/go-delve/bin/dlv/usr/local/bin/,把编译好的dlv拷贝进/usr/local/bin目录,替换之前有bug的dlv debugger。输入命令dlv version,如果能正常运行,显示版本号,说明dlv已经被加入到PATH。
在 Ubuntu 上安装Delve
对于Ubuntu系统,可以直接使用下面的指令安装Delve:
go get -u github.com/derekparker/delve/cmd/dlv
下载Go-Nebulas工程代码
mkdir /Users/xxx/workspace/blockchain/src/github.com/nebulasio/
cd /Users/xxx/workspace/blockchain/src/github.com/nebulasio/
git clone https://github.com/nebulasio/go-nebulas.git
创建一个临时文件夹,从github下载代码。注意文件夹中标注红色的部分,必须完全一样,这是因为go项目的源码组织规则,其它部分请根据自己机器环境设置。
Delve命令行调试 如果你以前用gdb调试过C程序,对dlv命令行调试的风格也不会陌生。完整的dlv命令文档,参见https://github.com/derekparker/delve/blob/master/Documentation/usage/dlv.md 这里只介绍debug部分。
输入如下命令进入调试
export GOPATH=/Users/xxx/workspace/blockchain/
cd /Users/xxx/workspace/blockchain/
dlv debug github.com/nebulasio/go-nebulas/cmd/neb -- --config /Users/xxx/workspace/blockchain/src/github.com/nebulasio/go-nebulas/conf/default/config.conf
运行无误的话,会进入debug session:
Type 'help' for list of commands.
(dlv)
我们打算在neb的函数入口设置断点,输入命令
(dlv) break main.neb
Breakpoint 1 set at 0x4ba6798 for main.neb() ./src/github.com/nebulasio/go-nebulas/cmd/neb/main.go:80
(dlv)
dlv调试器提示代码将在cmd/neb/main.go的行号80行停住,注意这时neb程序还没有运行。输入命令continue:
(dlv) continue
> main.neb() ./src/github.com/nebulasio/go-nebulas/cmd/neb/main.go:80 (hits goroutine(1):1 total:1) (PC: 0x4ba6798)
    75:        sort.Sort(cli.CommandsByName(app.Commands))
    76:
    77:        app.Run(os.Args)
    78:    }
    79:
=>  80:    func neb(ctx *cli.Context) error {
    81:        n, err := makeNeb(ctx)
    82:        if err != nil {
    83:            return err
    84:        }
    85:
查看变量,可用print命令:
(dlv) print ctx
*github.com/nebulasio/go-nebulas/vendor/github.com/urfave/cli.Context {
    App: *github.com/nebulasio/go-nebulas/vendor/github.com/urfave/cli.App {
        Name: "neb",
        HelpName: "debug",
        Usage: "the go-nebulas command line interface",
        UsageText: "",
        ArgsUsage: "",
        Version: ", branch , commit ",
        Description: "",
        Commands: []github.com/nebulasio/go-nebulas/vendor/github.com/urfave/cli.Command len: 11, cap: 18, [
            (*github.com/nebulasio/go-nebulas/vendor/github.com/urfave/cli.Command)(0xc4201f4000),
            (*github.com/nebulasio/go-nebulas/vendor/github.com/urfave/cli.Command)(0xc4201f4128),
            (*github.com/nebulasio/go-nebulas/vendor/github.com/urfave/cli.Command)(0xc4201f4250),
            (*github.com/nebulasio/go-nebulas/vendor/github.com/urfave/cli.Command)(0xc4201f4378),
            (*github.com/nebulasio/go-nebulas/vendor/github.com/urfave/cli.Command)(0xc4201f44a0),
更多技术资料,请参考 https://github.com/derekparker/delve/tree/master/Documentation/cli https://blog.gopheracademy.com/advent-2015/debugging-with-delve/ http://hustcat.github.io/getting-started-with-delve/
Visual Studio Code调试
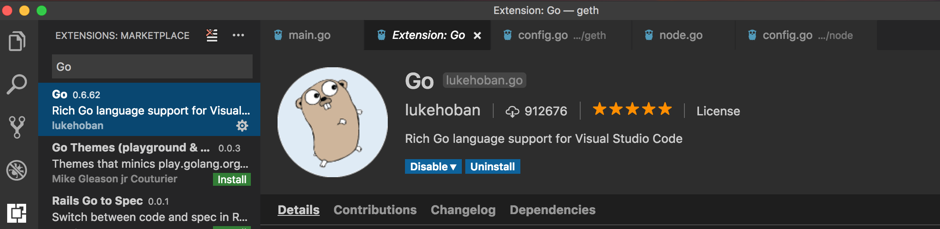
Visual Studio Code是微软公司发布的跨平台代码编辑工具,下载地址:https://code.visualstudio.com/Download VS Code需要安装Go插件
打开文件夹/Users/xxx/workspace/blockchain/src/github.com/nebulasio/go-nebulas/,在.vscode文件夹下创建两个文件settings.json和launch.json。 settings.json文件内容:
// Place your settings in this file to overwrite default and user settings.
{
    "go.gopath": "/Users/xxx/workspace/blockchain/",
    "go.formatOnSave": true,
    "go.gocodeAutoBuild": false,
    "go.toolsGopath": "/Users/xxx/workspace/gotools",
    "explorer.openEditors.visible": 0,
}
go.toolsGopath是analysis tools安装的地址,可以指定为任何目录,这些analysis tools可以供其它workspace共享。
launch.json文件内容:
{
    "version": "0.2.0",
    "configurations": [
        {
            "name": "Launch",
            "type": "go",
            "request": "launch",
            "mode": "debug",
            "program": "${workspaceRoot}/cmd/neb",
            "env": {
                "GOPATH": "/Users/xxx/workspace/blockchain/"
            },
            "args": [
                "--config",
                "/Users/xxx/workspace/blockchain/src/github.com/nebulasio/go-nebulas/conf/default/config.conf"
            ],
            "showLog": true
        }
    ]
}
在cmd/neb/main.go,neb函数中设置断点,F5运行,Go-Nebulas项目会进行编译运行,停在断点: 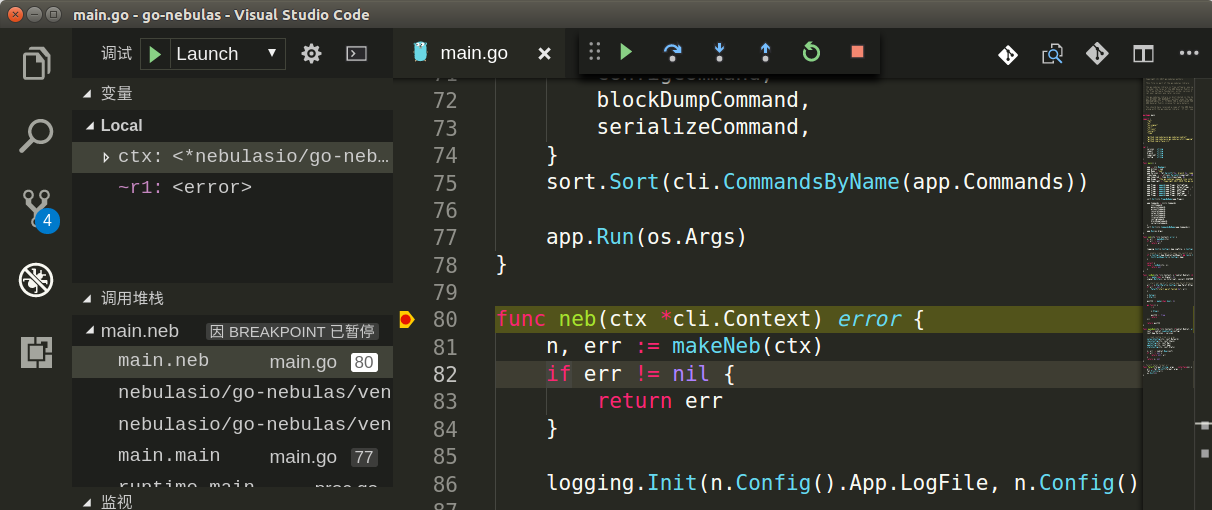
然后,就可以开心的启动Nebulas代码调试之旅!